dbForge Studio for MySQL activation
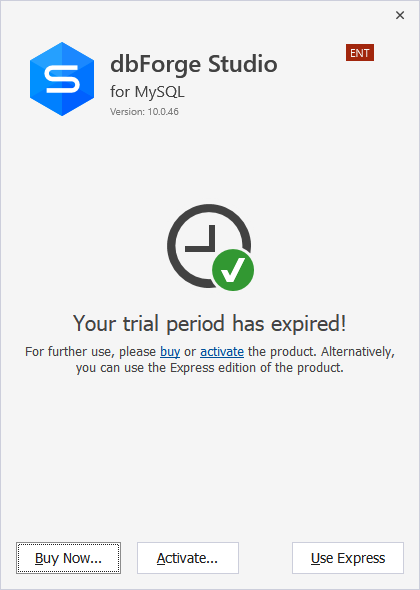
Unless activated, dbForge Studio for MySQL works on the trial basis for 30 days. When this time period expires, dbForge Studio for MySQL must be activated with the purchased activation key.
dbForge Studio for MySQL can be activated online, offline and via the command line.
Online activation
This activation method requires an active Internet connection.
To activate dbForge Studio for MySQL online:
If you have not purchased dbForge Studio for MySQL, click Buy Now on the pop-up window that appears at the start of dbForge Studio for MySQL. If you have your activation key, click Activate.
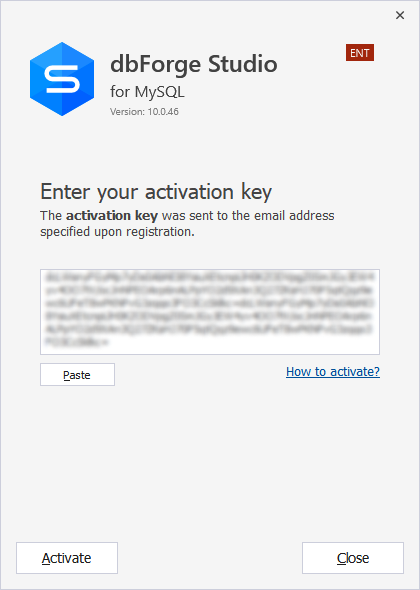
Alternatively, click Activate Product on the Help menu.
In the Activation window that opens, copy your activation key from the e-mail that was sent to you after your purchase, and paste it into the edit box.
The activation key looks like a long sequence of letters and digits.
Note
If you do not see the e-mail with the activation key, be advised to check your Junk/ Spam/Bulk folders.
You can always retrieve your activation key at your Customer portal page.
To complete the activation, click Activate.
Offline activation
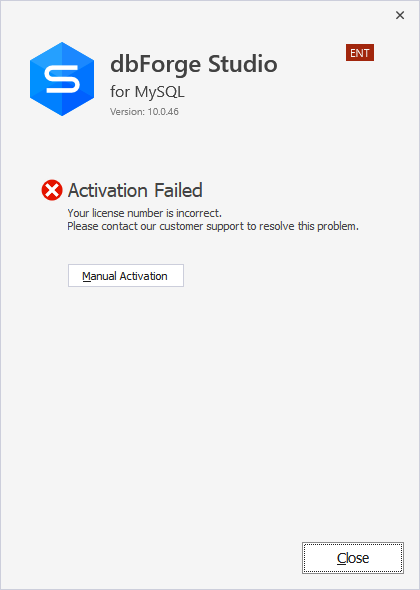
Offline activation allows activating dbForge Studio for MySQL right at the Devart website. This activation method helps to activate the product when the online activation fails.
To activate dbForge Studio for MySQL offline:
In the Activation window, click Manual Activation. The activation window opens when online activation fails.
To copy the activation request text, click Copy to Clipboard.
-or-
To save the activation request text to a text file, click Save to File.
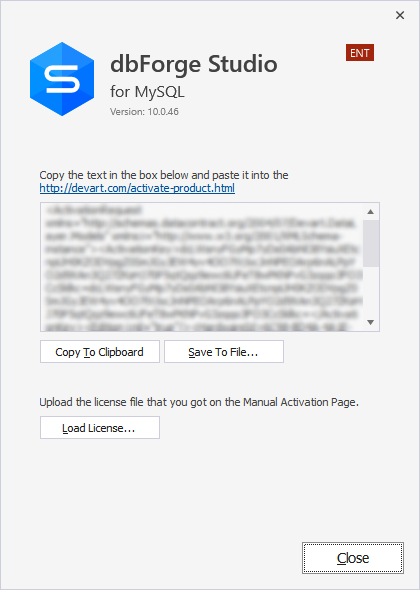
Open the Manual Product Activation page of the Devart website, paste the copied text into the text box, and then click Download license. The license file with the .lic extension is downloaded to your computer.
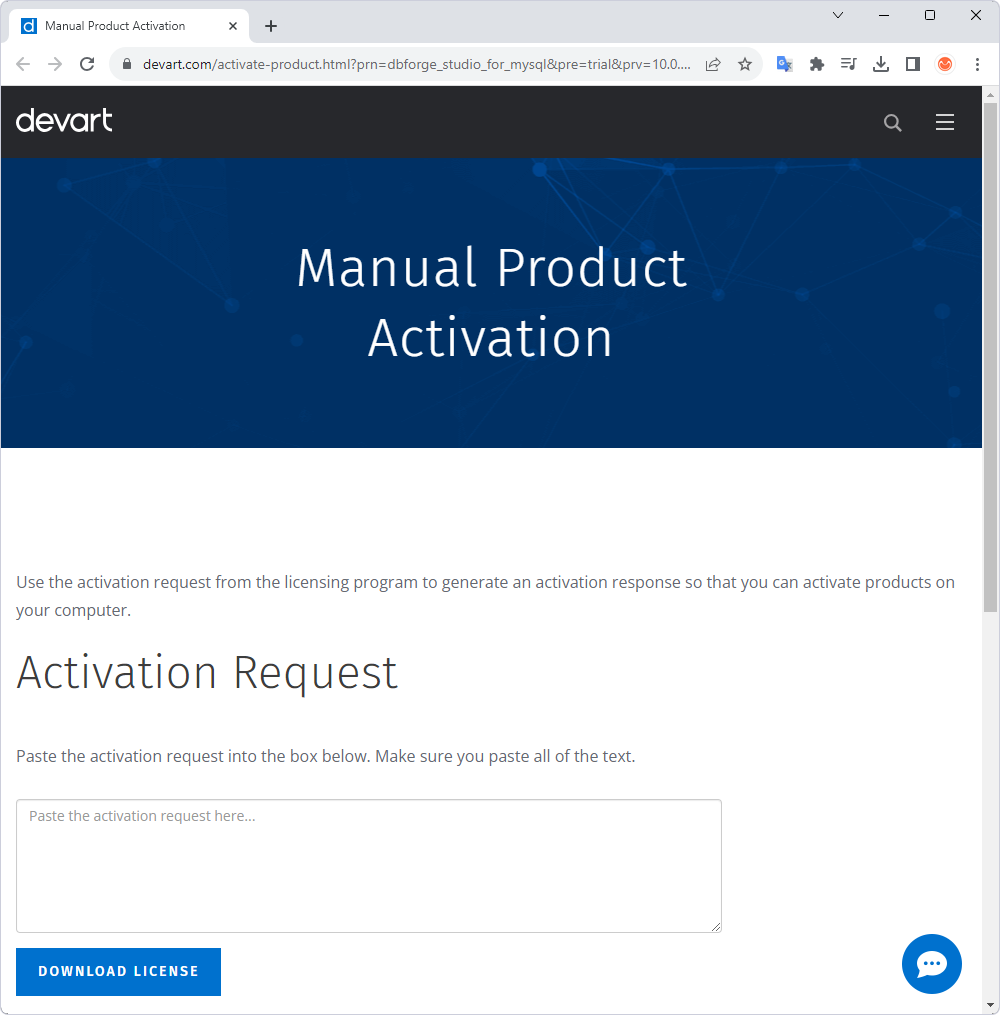
Return back to the Activation window of dbForge Studio for MySQL, click Load license, specify the location of the downloaded .lic file, and then click Open.
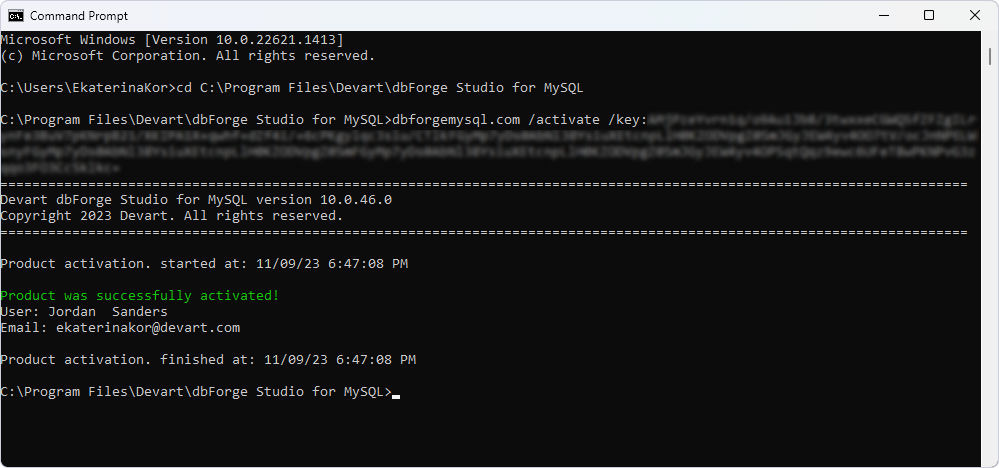
Activation via the command line
To activate dbForge Studio for MySQL using the command line:
- Open the command prompt.
- Proceed to the folder where your executable file is located.
- Run a command with the following syntax:
dbforgemysql.com /activate /key:
Note:
You need to enter your activation key after the colon symbol.
In case of successful installation, you will see the following:
Related Articles
How to Connect to MySQL Server
In the second article of the series uncovering how to get started with MySQL, we talk about the ways of connecting to MySQL Server. You can connect to MySQL Server using MySQL Client, dbForge Studio for MySQL, and MySQL Workbench. In this article, we ...dbForge Studio for SQL Server activation
Unless activated, dbForge Studio for SQL Server works on the trial basis for 30 days. When this time period expires, dbForge Studio for SQL Server must be activated with the purchased activation key. dbForge Studio for SQL Server can be activated ...Limit of activations exceeded (dbForge)
The point is that when you change any hardware part of your computer or reinstall the OS or change a profile on your computer, your Hardware ID changes so the software considers it as an installation on an alternative computer. Virtual machine ...Table script generation (dbForge Studio for SQL Server)
In order to create the table script, you may open the "Depends on" node for the procedure, choose all objects (tables), and choose the following command in the pop-up window which will appear: Generate Script As->Create->To New SQL Window. Once this ...Timestamps not in expected timezone
If you get a timestamp that does not correspond yours in dbForge Studio for Oracle, please follow several steps below to fix it: 1. Select 'Tools -> Options...' from the main menu. 2. Navigate to the 'Data Editor -> Formatting' section. 3. Select ...