How to Install MySQL on Windows Using MySQL Installer
This article provides a comprehensive walkthrough on how to install MySQL on Windows using the official MySQL Installer. Follow the step-by-step guide to ensure MySQL Server and its tools are installed and configured correctly for development or production use.
Download MySQL Installer
The most convenient method to install MySQL on Windows is by using the official MySQL Installer. This setup wizard streamlines the installation and configuration of MySQL products running on Microsoft Windows.
Included MySQL products:
- MySQL Server
- MySQL Workbench
- MySQL Shell
- MySQL Router
- MySQL for Visual Studio
- MySQL Connectors (e.g., .NET, Python)
- MySQL Reference Manuals (PDF)
- MySQL Sample Databases
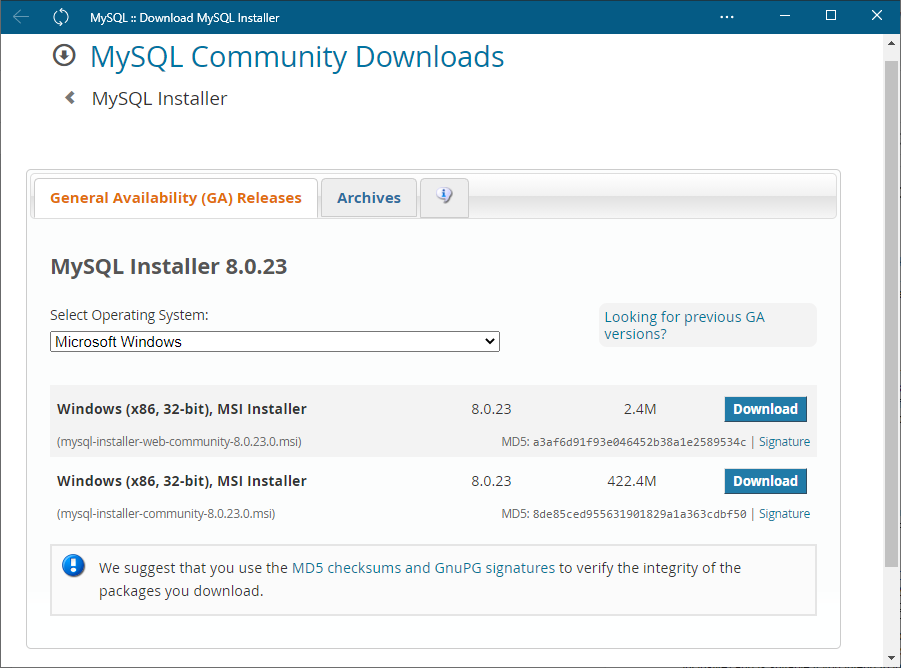
To begin, go to the MySQL Installer download page. Two installer types are available:
- Web Installer (smaller, requires internet) – downloads components during installation
- Full Installer (larger, offline) – includes all MySQL products in one package
Set Up MySQL Installer for Windows
After downloading the appropriate version, run the MySQL Installer executable.
💡 Note: The MySQL installer can also be used to update or manage existing MySQL products on your system.
Upon launch, accept the license agreement and choose a setup type.
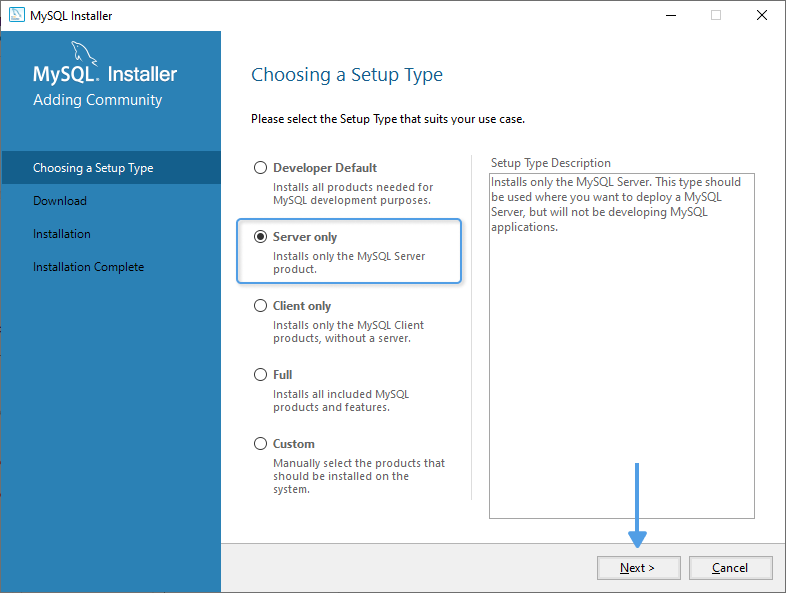
Available setup types:
- Developer Default – Installs MySQL Server plus all development tools
- Server Only – Installs only the MySQL Server instance
- Client Only – Installs MySQL apps and connectors, excluding MySQL Server
- Full – Installs all available MySQL components
- Custom – Lets you manually choose which components to install
1. Select the Setup Type and click Next:
2. Check Product Requirements
Following that, MySQL Installer ensures that you meet the requirements necessary for the installation. If there are any failing requirements, the installer will try to resolve the inconsistencies automatically. If it fails to do so, you will be asked to manually settle the issues. For instance, you may need to install some additional applications or packages (e.g., Microsoft Visual C++ 2019 Redistributable Package). Besides, you may encounter the problem of Path installation inconsistencies in case you have previously installed MySQL on your Windows Server.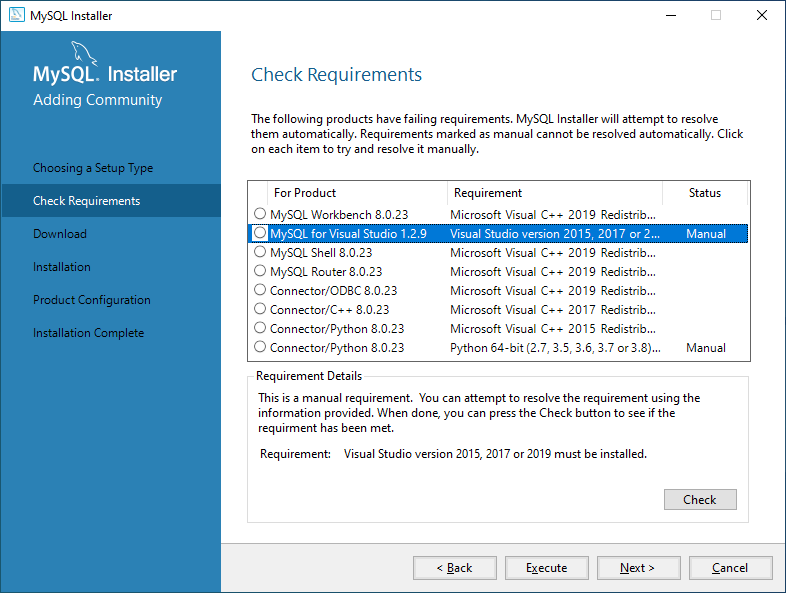
3. Execute Required Software Installations
Check the status of the product requirements (if you have any). If you have no manual requirements, Click Execute, and the Wizard will install the required software. Provided that you have manual requirements, resolve them on your own, click Check to verify, and then click Execute to begin the installation process:
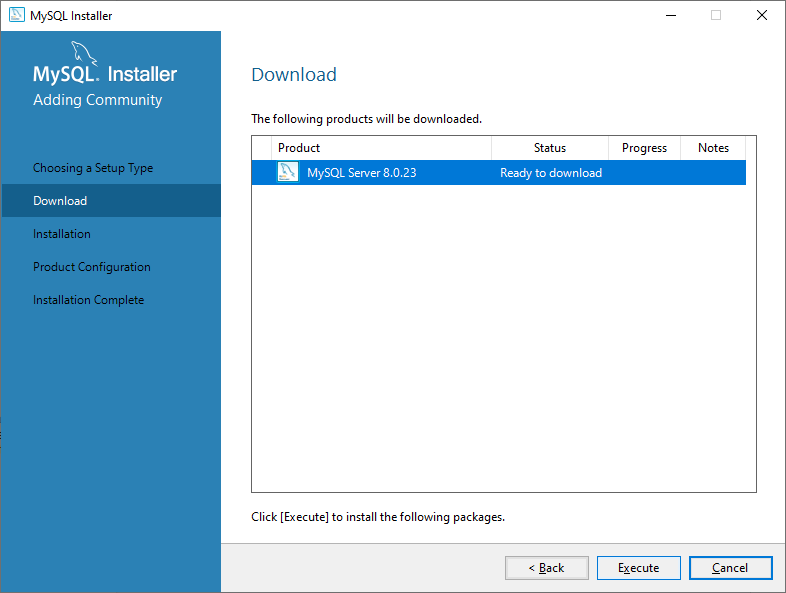
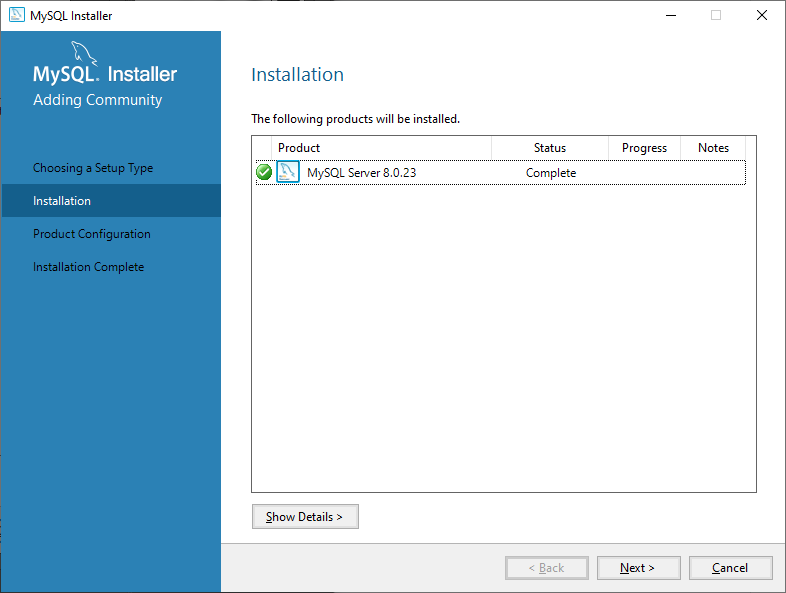
4. Install MySQL using the MySQL installer
The selected products will now be downloaded and installed. Once complete, click Next to continue to the configuration.
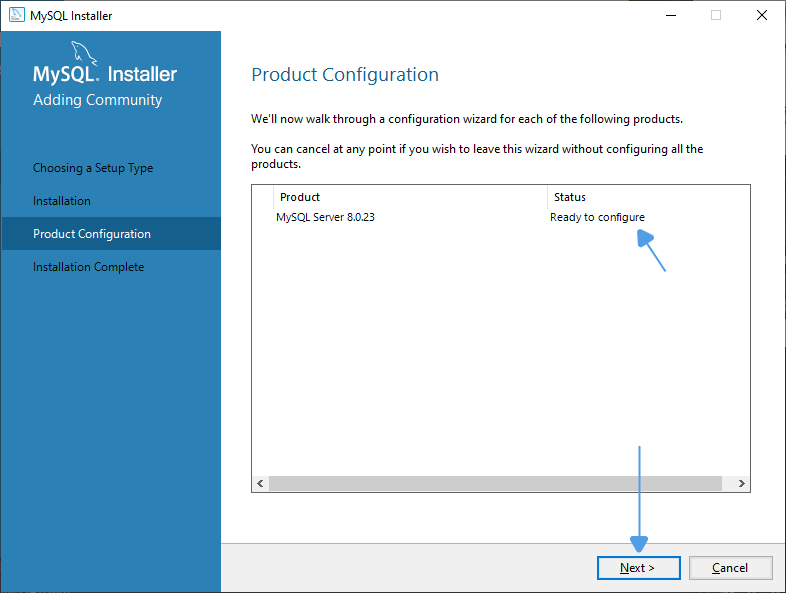
5. Configure MySQL Server on Windows
Click Next to start server configuration.
6. Type and Networking
Choose a server configuration type (Development, Server, or Dedicated Computer) based on your usage.
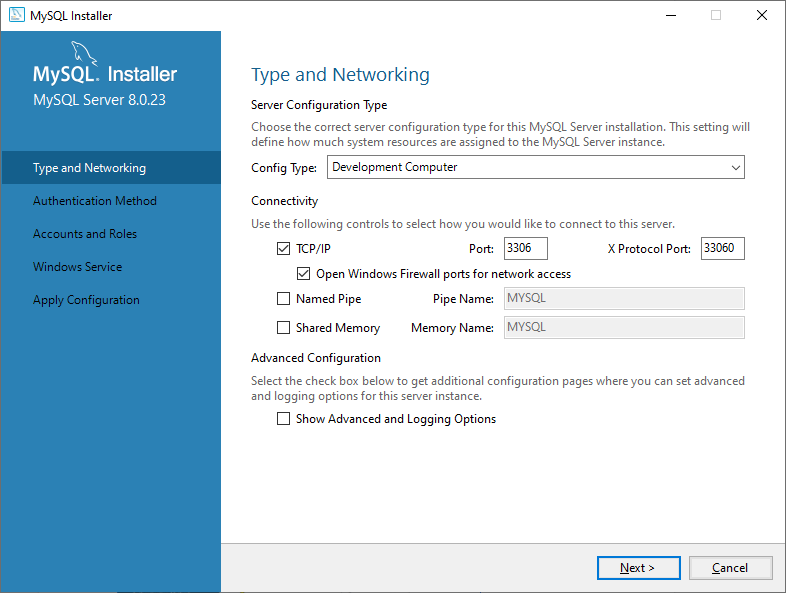
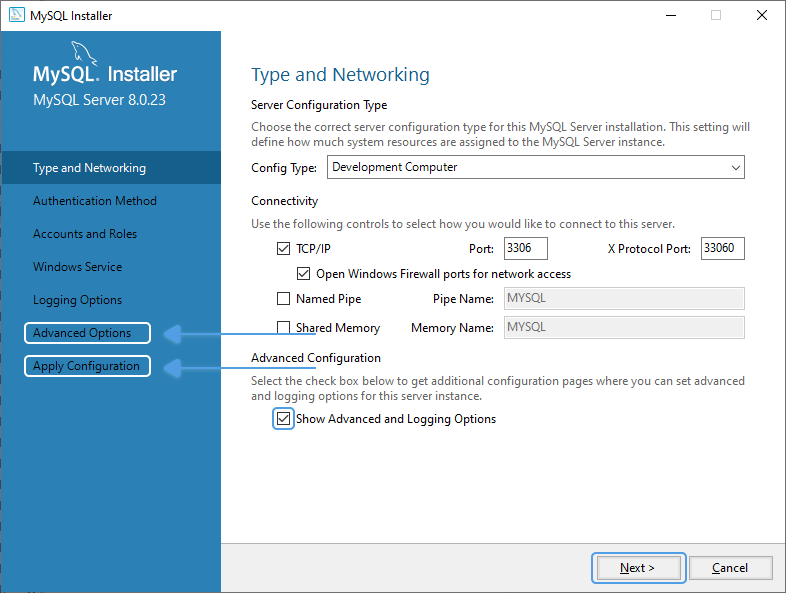
7. Connectivity Options
You can also configure custom logging and advanced options in the following steps if you check the corresponding box. After you have finished configuring, click Next:
8. Authentication Method
In this step, select between Strong Password Authentication (recommended) or Legacy Authentication option and click Next: 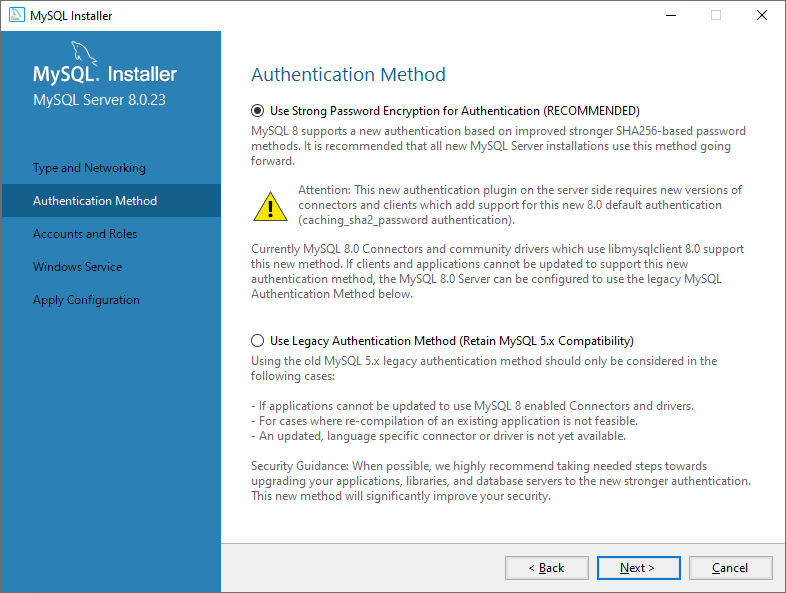
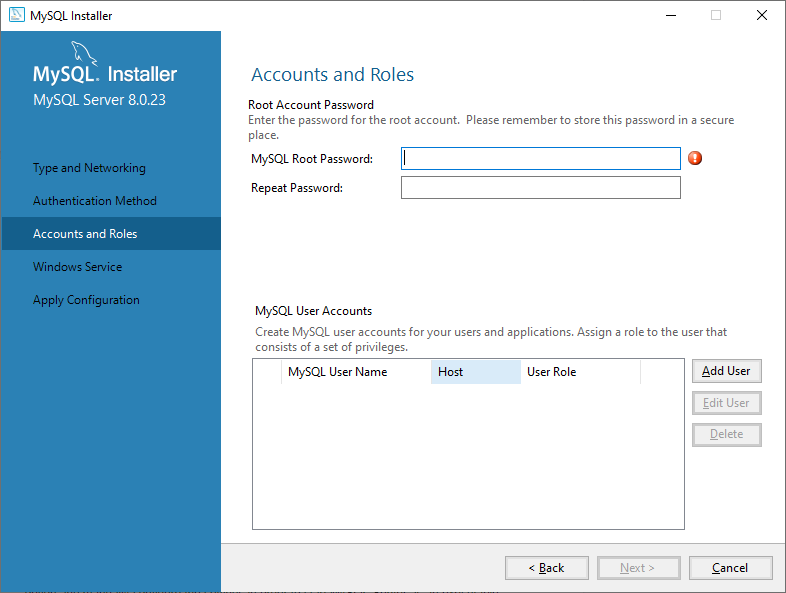
9. Accounts and Roles
Set a strong password for the MySQL root user. Also, make sure you save the password in a secure place for later use. Optionally, you can create additional MySQL user accounts with predefined roles. Click Next as soon as you are finished:
10. Windows Service
Set MySQL Server to run as a Windows Service. Optionally configure it to start manually or use a custom account.

11. Apply Configuration
Review all selected configuration settings.
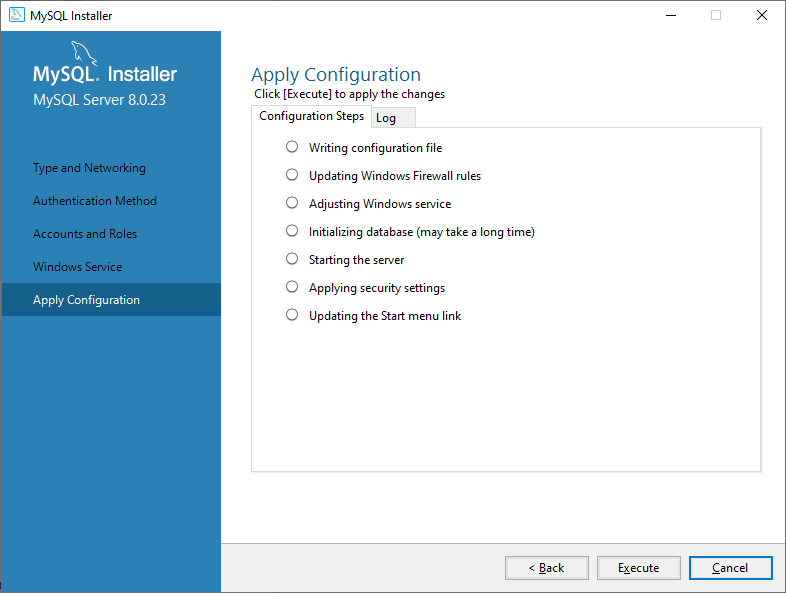
12. Execute Configuration
By clicking Execute, you will see the configuration settings applied one by one:

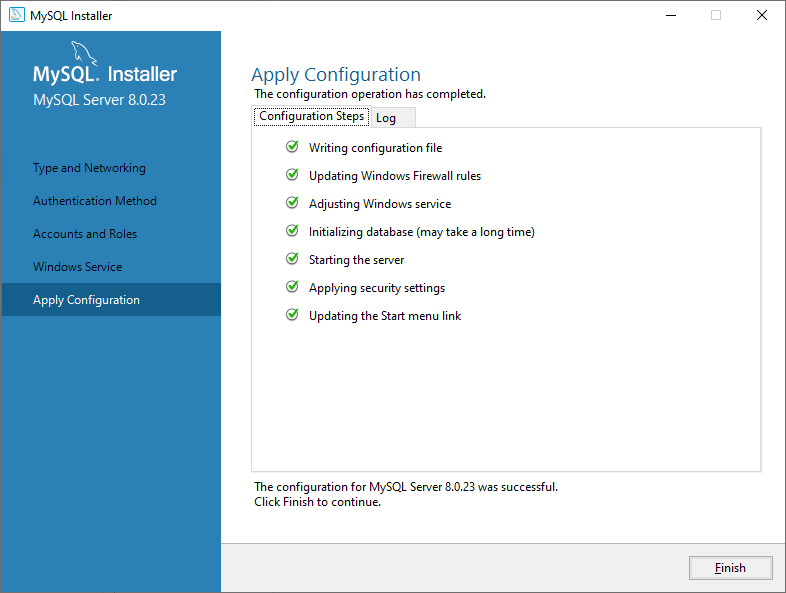
13. Confirm Completion
Green checkmarks indicate a successful configuration. Click Finish:
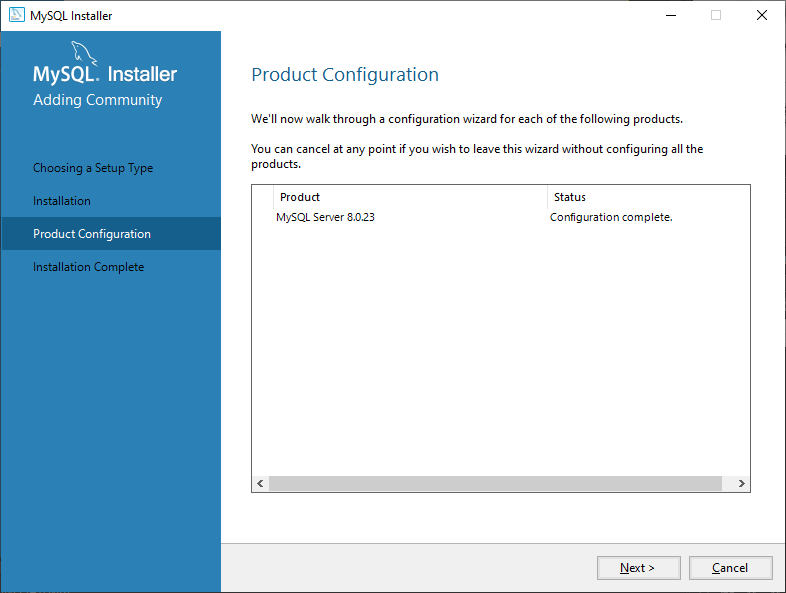
14. Complete Product Configuration
Click Next to finalize setup:
15. Installation Complete
Congratulations! You have finished installing MySQL Server. You can now copy the installation process log to the Windows Clipboard and click Finish: 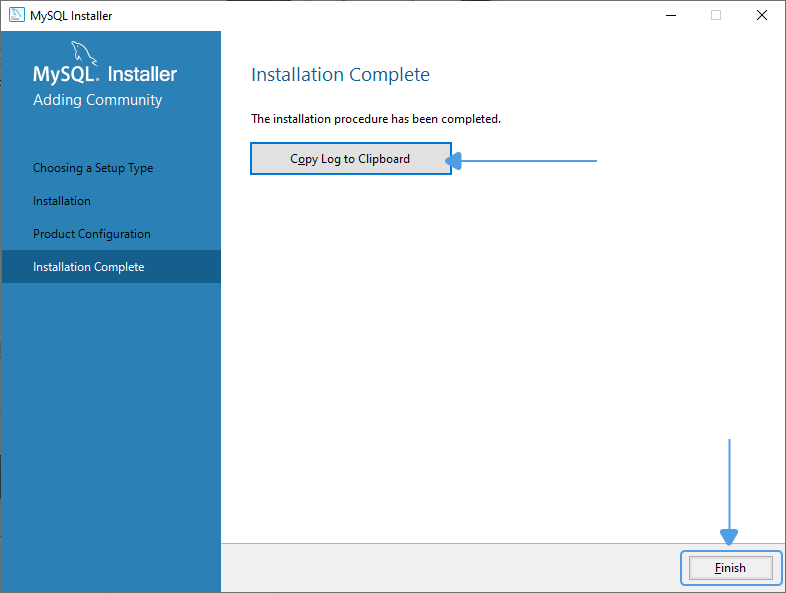
Conclusion
This guide demonstrated how to install MySQL on Windows using the official MySQL Installer. To get started working with MySQL Server, you can use tools like MySQL Workbench or opt for powerful third-party solutions like dbForge Studio for MySQL. These tools help streamline development, data management, and administration tasks.

Related Articles
How to Connect to MySQL Server
In the second article of the series uncovering how to get started with MySQL, we talk about the ways of connecting to MySQL Server. You can connect to MySQL Server using MySQL Client, dbForge Studio for MySQL, and MySQL Workbench. In this article, we ...Lost Connection to MySQL Server
A lost connection to a MySQL server is a common issue and, in most cases, is not related to dbForge tools. It typically occurs due to server settings, network interruptions, or long-running queries. Recommended Solution For official guidance on ...dbForge installer didn't install the expected edition
If you've purchased the Standard, Professional, or Enterprise edition of a dbForge product, but the installer didn't install the expected edition, it’s important to understand that the downloaded installation file (.exe) does not determine the ...TLS 1.3 Support on Windows 10 with MySQL and PostgreSQL
Issue When connecting to MySQL or PostgreSQL servers on Windows 10, you may encounter errors if the server is configured to use only TLS 1.3. However, the connection succeeds if TLS 1.2 and TLS 1.3 are both enabled. Reason Windows 10 does not support ...Unable to Connect Using macOS DSN Configuration
If you’ve installed an ODBC driver on macOS but can’t proceed with setting up a DSN because the iODBC Data Source Administrator app is missing, here’s how to resolve the issue. Step 1: Install iODBC Manager To test and manage ODBC connections on ...