How to Work in Power Query Using ODBC Driver
1. Connect to an ODBC Source
In Power BI Desktop, go to the Home tab and click on Get Data to connect to an ODBC source.

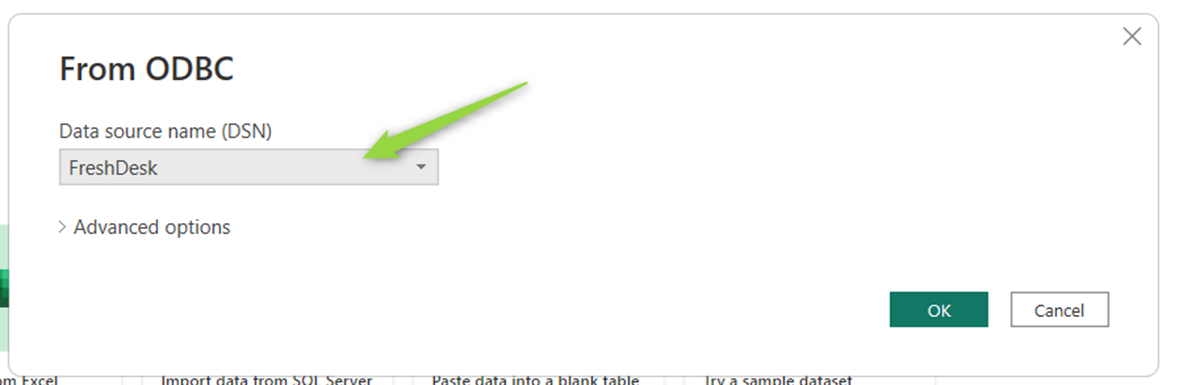


From the list of available connections, select the DSN connection that you created in the ODBC Administration tool.
You can learn how to set up your DSN connection for FreshDesk by following this link:
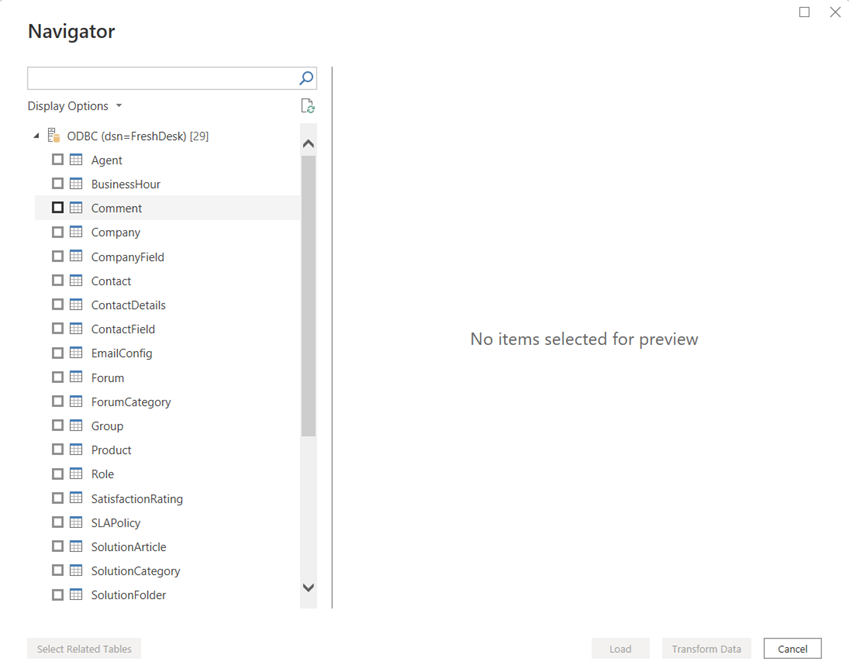
After selecting the DSN and clicking OK, you'll see a list of available FreshDesk objects that you can use in Power BI:
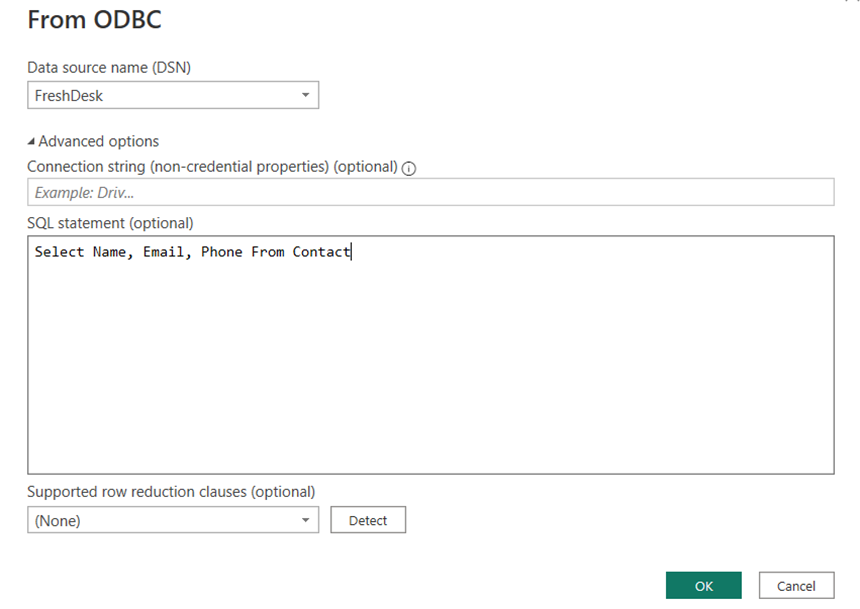
You can also provide an SQL query to specify the data you want to retrieve, such as limiting the number of rows or excluding unnecessary columns:
2. Load or Transform Data
At this stage, you can choose to either:
- Load the data directly into Power BI, or
- Transform Data to make changes before loading it.
If you select Transform Data, the Power Query Editor will open, showing a preview of your table. The Query Options will appear on the right, or you can always access them by clicking on Query Options in the View tab:
3. Shaping the Data
Once your data is connected, you can start customizing it. Shaping means changing the data by:
- Renaming columns or tables
- Deleting rows or columns
- Changing data types
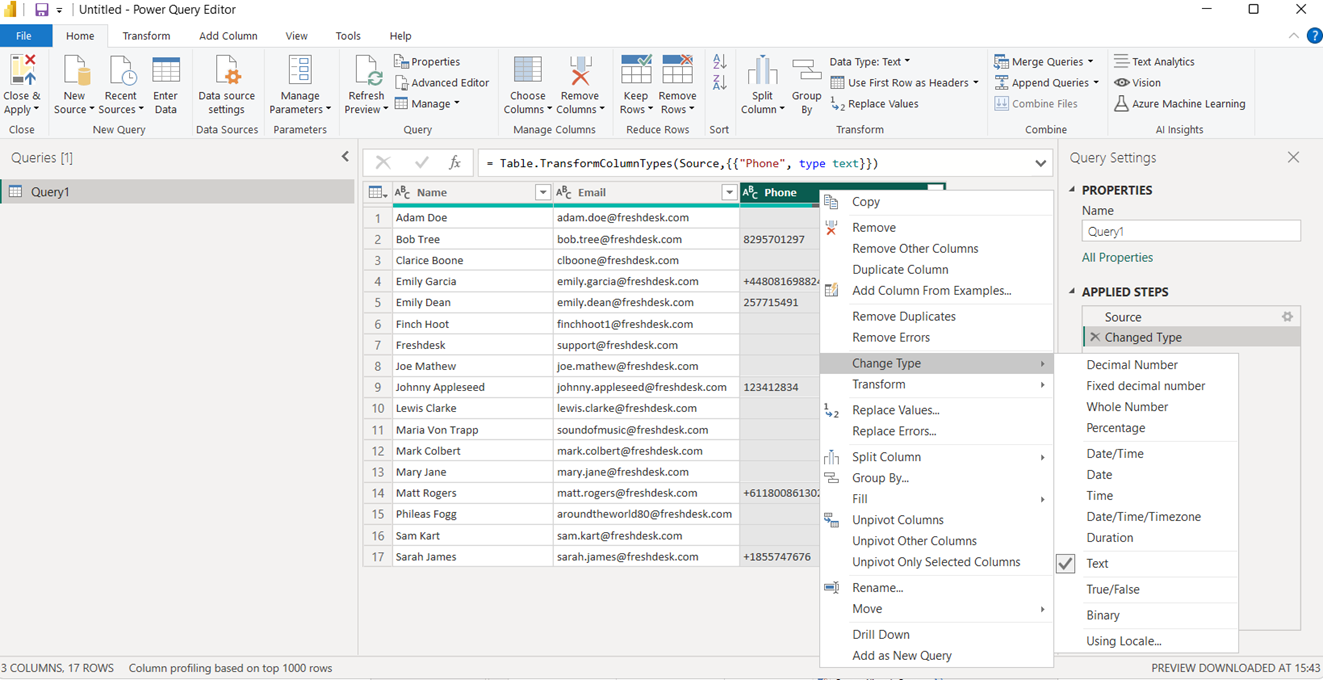
For example, if you need to change the data type of a column, select the column (or multiple columns by holding Shift for contiguous columns or Ctrl for non-contiguous columns). Right-click the column header, choose Change Data Type, and select the new type from the options in the Transform section:
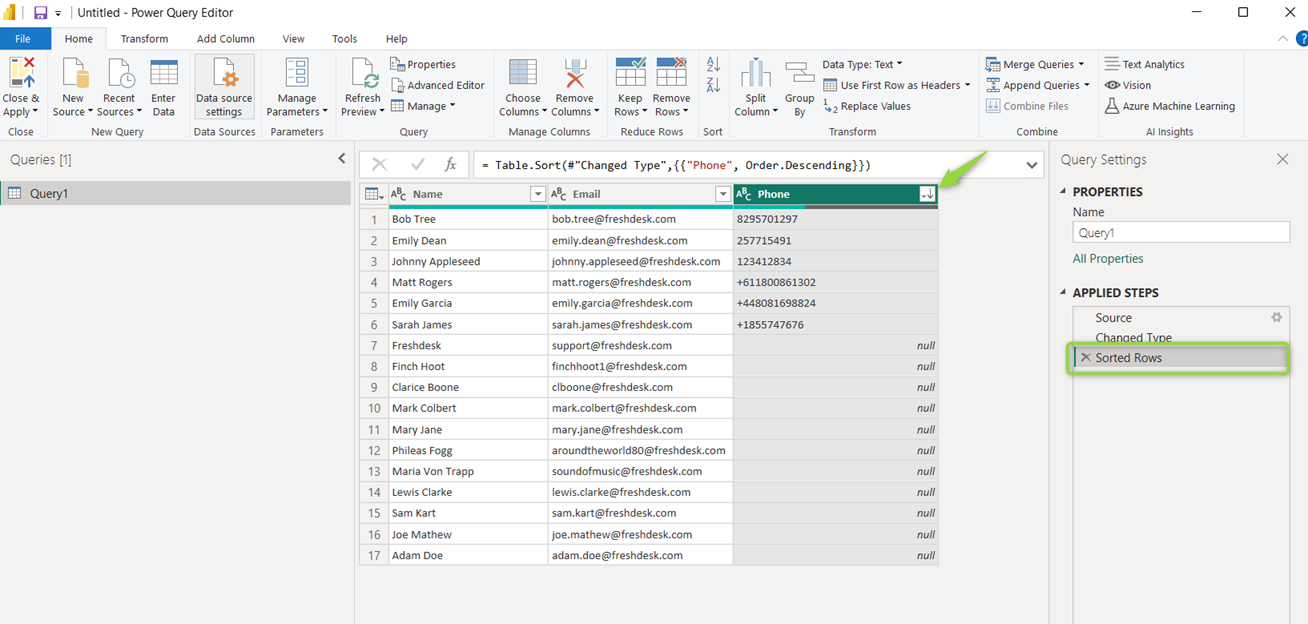
Example: Sorting Data
If you want to sort the records by the Phone column, click the arrow next to the Phone column header and select Sort Ascending. The data will be sorted by the phone number, and the Sorted Rows step will appear in the Applied Steps section:
If you want to remove records that don’t have a Phone number, you can delete the rows. Go to the Home tab, select Delete Rows > Remove Bottom Rows. In the dialog box, enter the number of rows to remove (for example, 10), and click OK:
This will remove the bottom 10 rows, and the step "Bottom rows removed" will be recorded in the Applied Steps section.
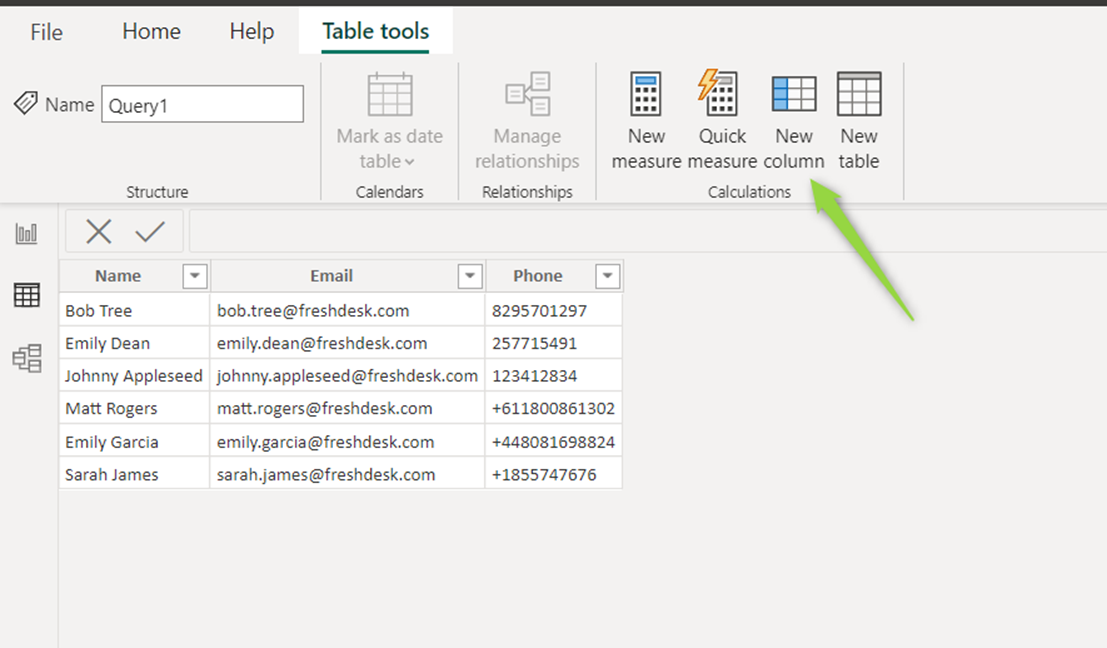
4. Create Calculated Columns
You can create new columns in Power BI by combining existing data. For example, you can apply a formula to an existing column or create a new column by combining two columns.
To add a new calculated column, go to the Table Tools tab on the left and click Add Column:
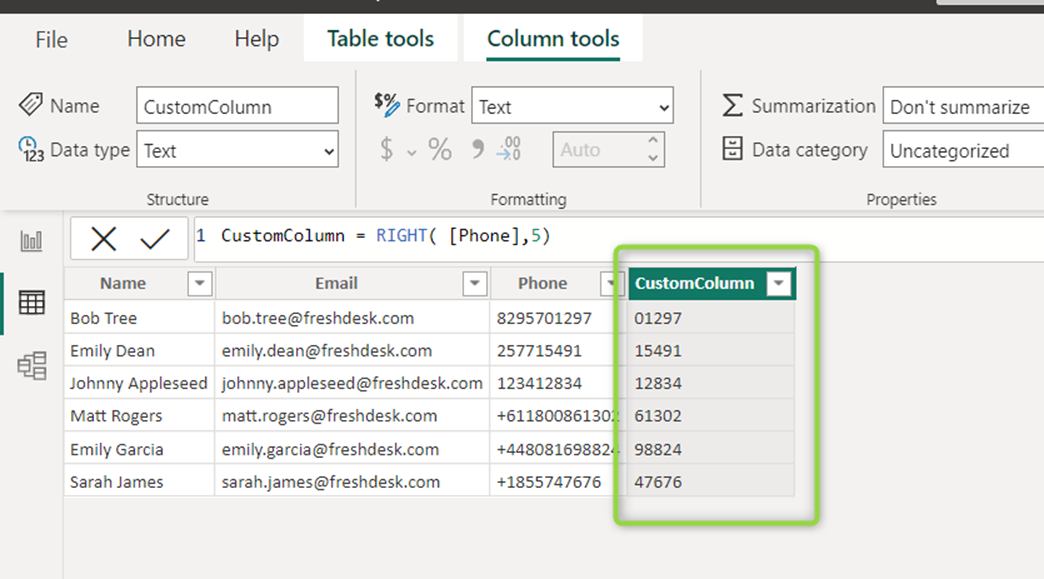
Example: Creating a Custom Column
In this example, let’s create a new column called CustomColumn, which extracts the last 5 characters from the Phone column.
Use the formula:
CustomColumn = RIGHT([Phone], 5):
This creates a new column with the last five characters of the Phone number, which can be helpful for analyzing phone numbers more effectively.
Related Articles
Setting up a Connection to Power BI Online Using Devart ODBC Driver
In this guide, we will walk you through the process of setting up a connection to Power BI Online using the Devart ODBC Driver. This involves creating a DSN connection, setting up an on-premises gateway, and verifying Power BI report settings. Step ...Using ODBC Drivers with Power BI Online
Power BI Online supports working with ODBC drivers, but to ensure proper functionality—especially for scheduled data refresh—you need to configure the setup correctly. Make sure the Power BI Data Gateway is installed on the same computer where the ...Guide: Configuring ODBC Driver in Azure Data Factory
This guide walks you through the steps of setting up and using an ODBC driver in Azure Data Factory (ADF) for seamless data integration. By following this guide, you will be able to configure an ODBC driver, create a Linked Service, and define an ...How to Connect Using ODBC in Crystal Reports
Crystal Reports allows users to build custom reports by connecting to various data sources. To connect using an ODBC driver, follow these steps: Step 1: Create a Crystal Reports Application Launch Crystal Reports and create a new report. Select a ...Setting up a Connection to ODBC in Delphi Using Devart ODBC Driver
This guide will walk you through the steps of setting up a connection to an ODBC driver in Delphi. We'll use ODBC Driver for Salesforce as an example. Prerequisites: Devart ODBC Driver for Salesforce installed on your machine. A Salesforce account ...